
Torque Verification Procedure for Ingersoll Rand QX Series Wrench Using Bahco TAM12135 Adapter
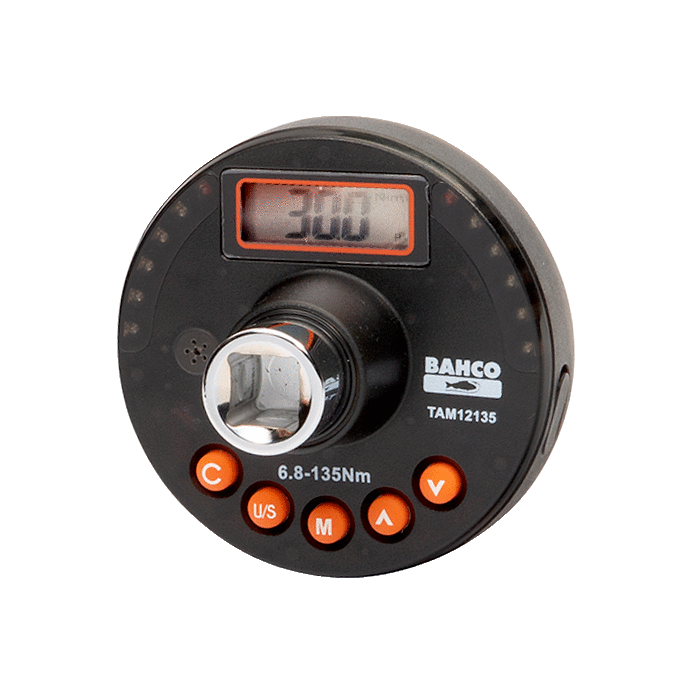
Equipment Required : Bahco TAM12135 Digital Torque Adapter ( or other Similar tool)
https://www.bahco.com/int_en/electronic-torque-and-angle-meter-pb_tam_.html
1. Purpose
This procedure defines the steps for performing a periodic torque verification of the Ingersoll Rand QX Series tool using the Bahco TAM12135. This ensures that the tool's output remains compliant with the maintenance standards required for CORTEX Service operations.
2.Disclaimer
Notice: The Bahco TAM12135 digital adapter must be independently calibrated or verified at scheduled intervals according to the manufacturer’s specifications. ADB SAFEGATE provides this procedure as a suggestion for field verification only. Accuracy is dependent on the calibration state of both tools.
3. Tool Configuration (Verification Mode)
To minimize the impact of sampling frequency discrepancies between the high-speed QX wrench and the Bahco adapter, the tool must be set to its slowest functional speeds. Configure your Pset in the Insight Connect app as follows:
Setting | Value |
Target Torque | 40 Nm |
Free Speed | 10 RPM |
Shift Down Speed | 10 RPM |
Shift Down Point | 10 Nm |
Acceleration | 5% |
By utilizing these "Slow Speed" settings, we minimize the risk of the Bahco adapter missing the peak torque event due to its internal sampling rate.
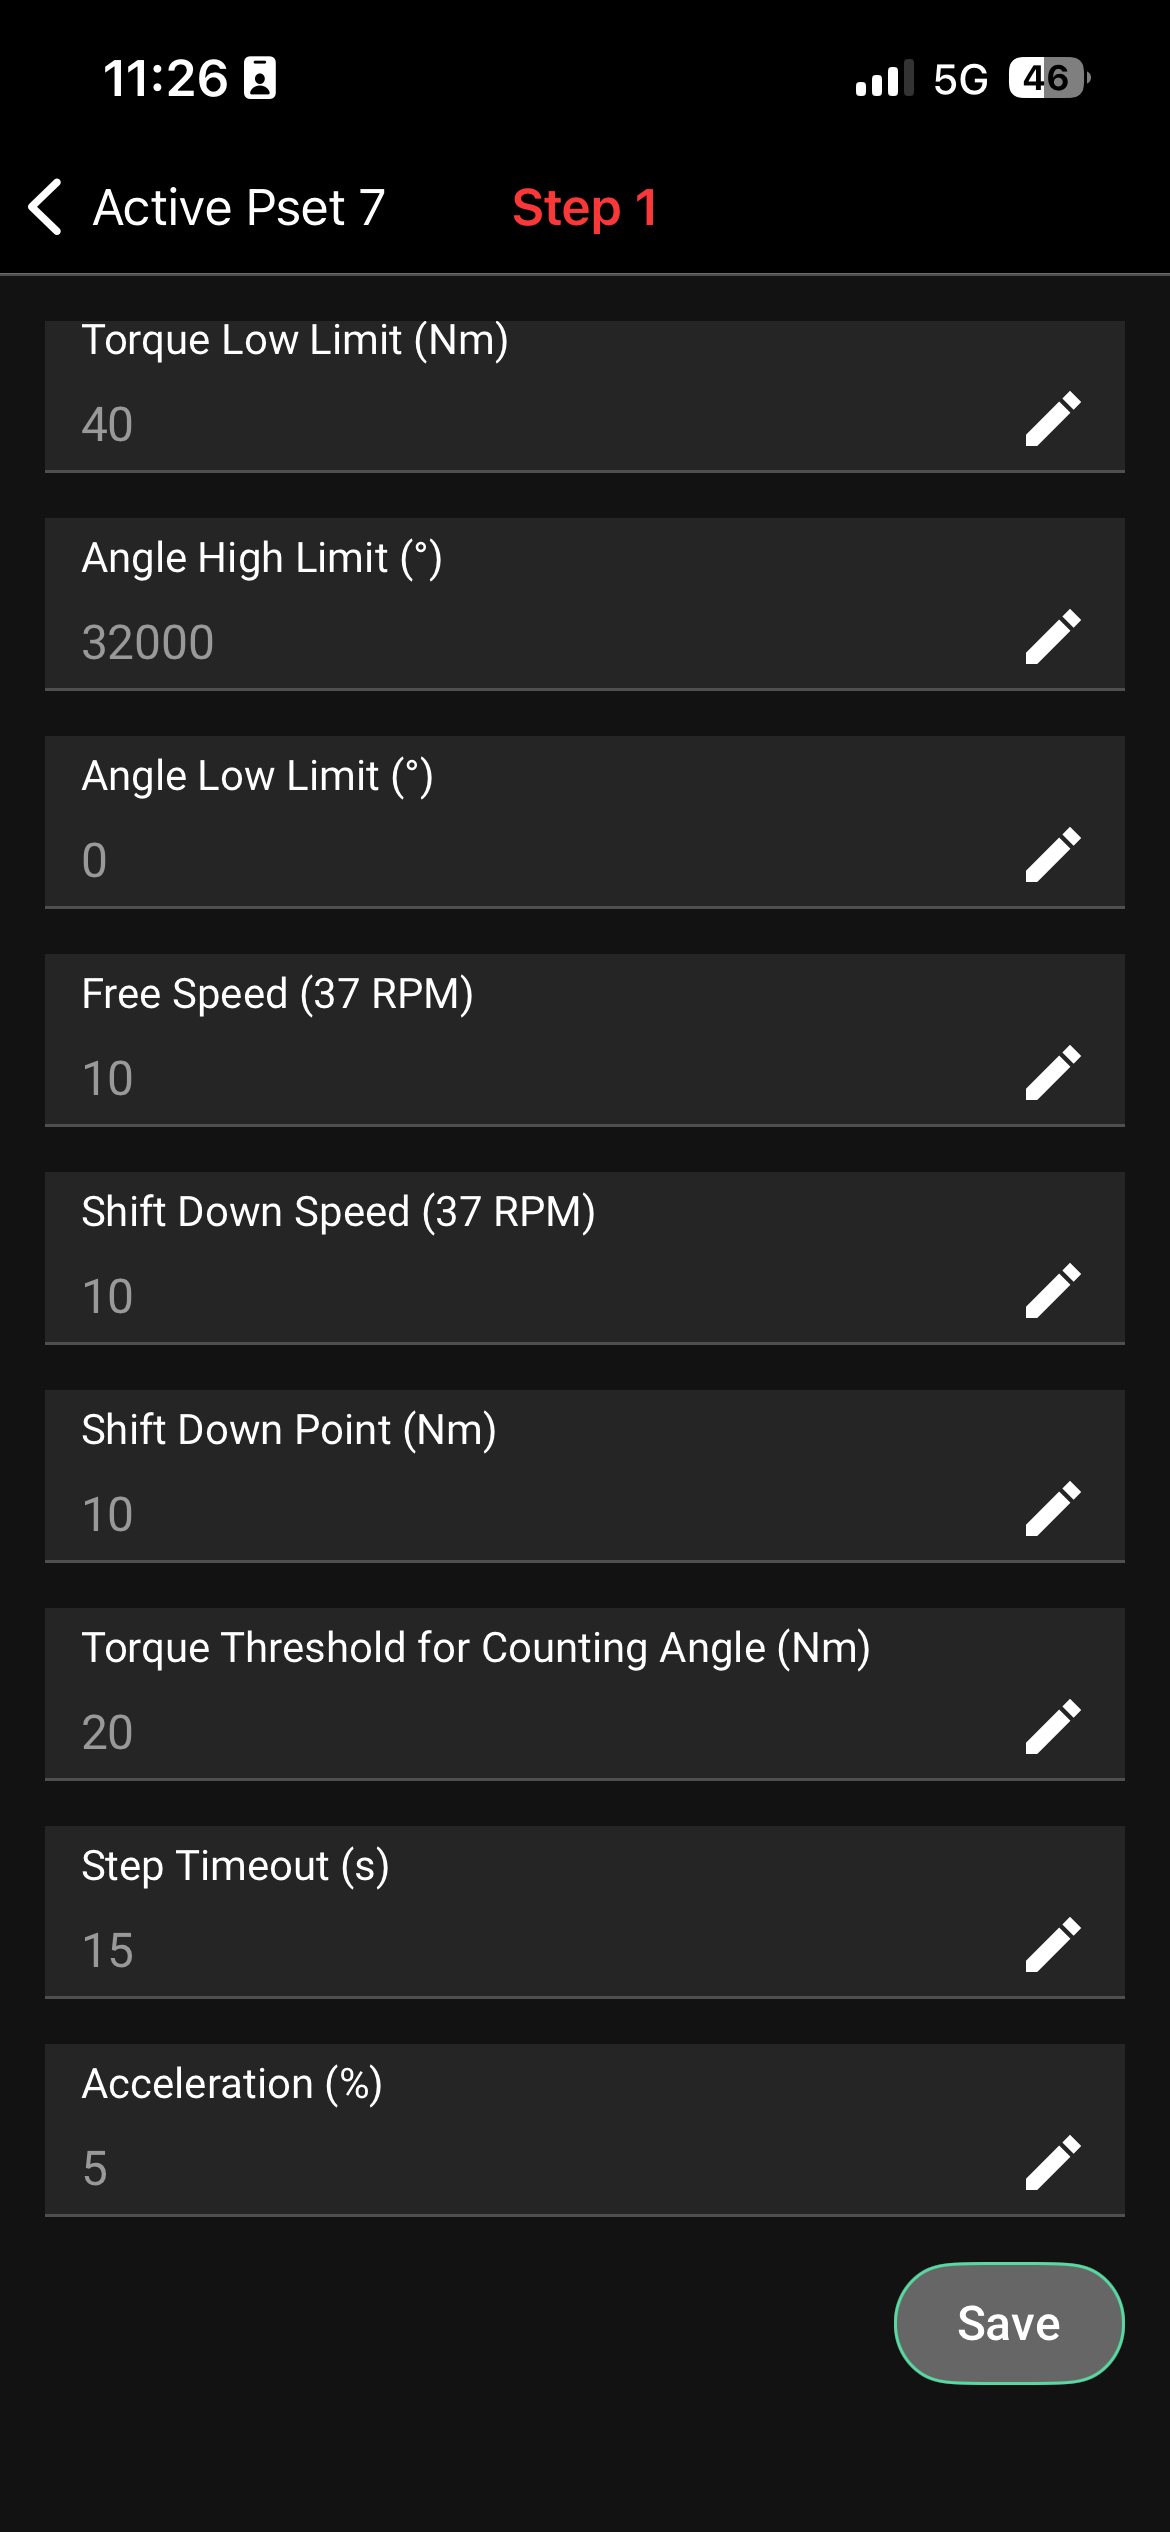
Active the preset with these settings for the torque verification process
4. Verification Steps
A. Bahco TAM12135 Setup
Mount the Joint: Secure the test joint (fixed bolt or joint simulator) in a sturdy vise.
Power On: Turn on the Bahco adapter.
Set to PEAK Mode: Press the "M" button until "PEAK" appears on the display.
Zero the Tool: Press the Zero/Clear button to ensure the starting value is 0.0 Nm.
B. Execution
Place the QX Wrench onto the Bahco adapter.
Maintain a steady, perpendicular posture to the tool.
Depress the trigger fully and allow the tool to complete its cycle at the programmed 10 RPM.
Once the QX tool shows a Green Light (OK), stop and record the values.
C. Data Collection
Repeat the test 5 to 10 times to establish a reliable average. Record the following for each pull into the CORTEX Service log (Example Below) :
QX Reported Value: (The number shown on the wrench display).
Bahco Actual Value: (The number shown on the Bahco display).
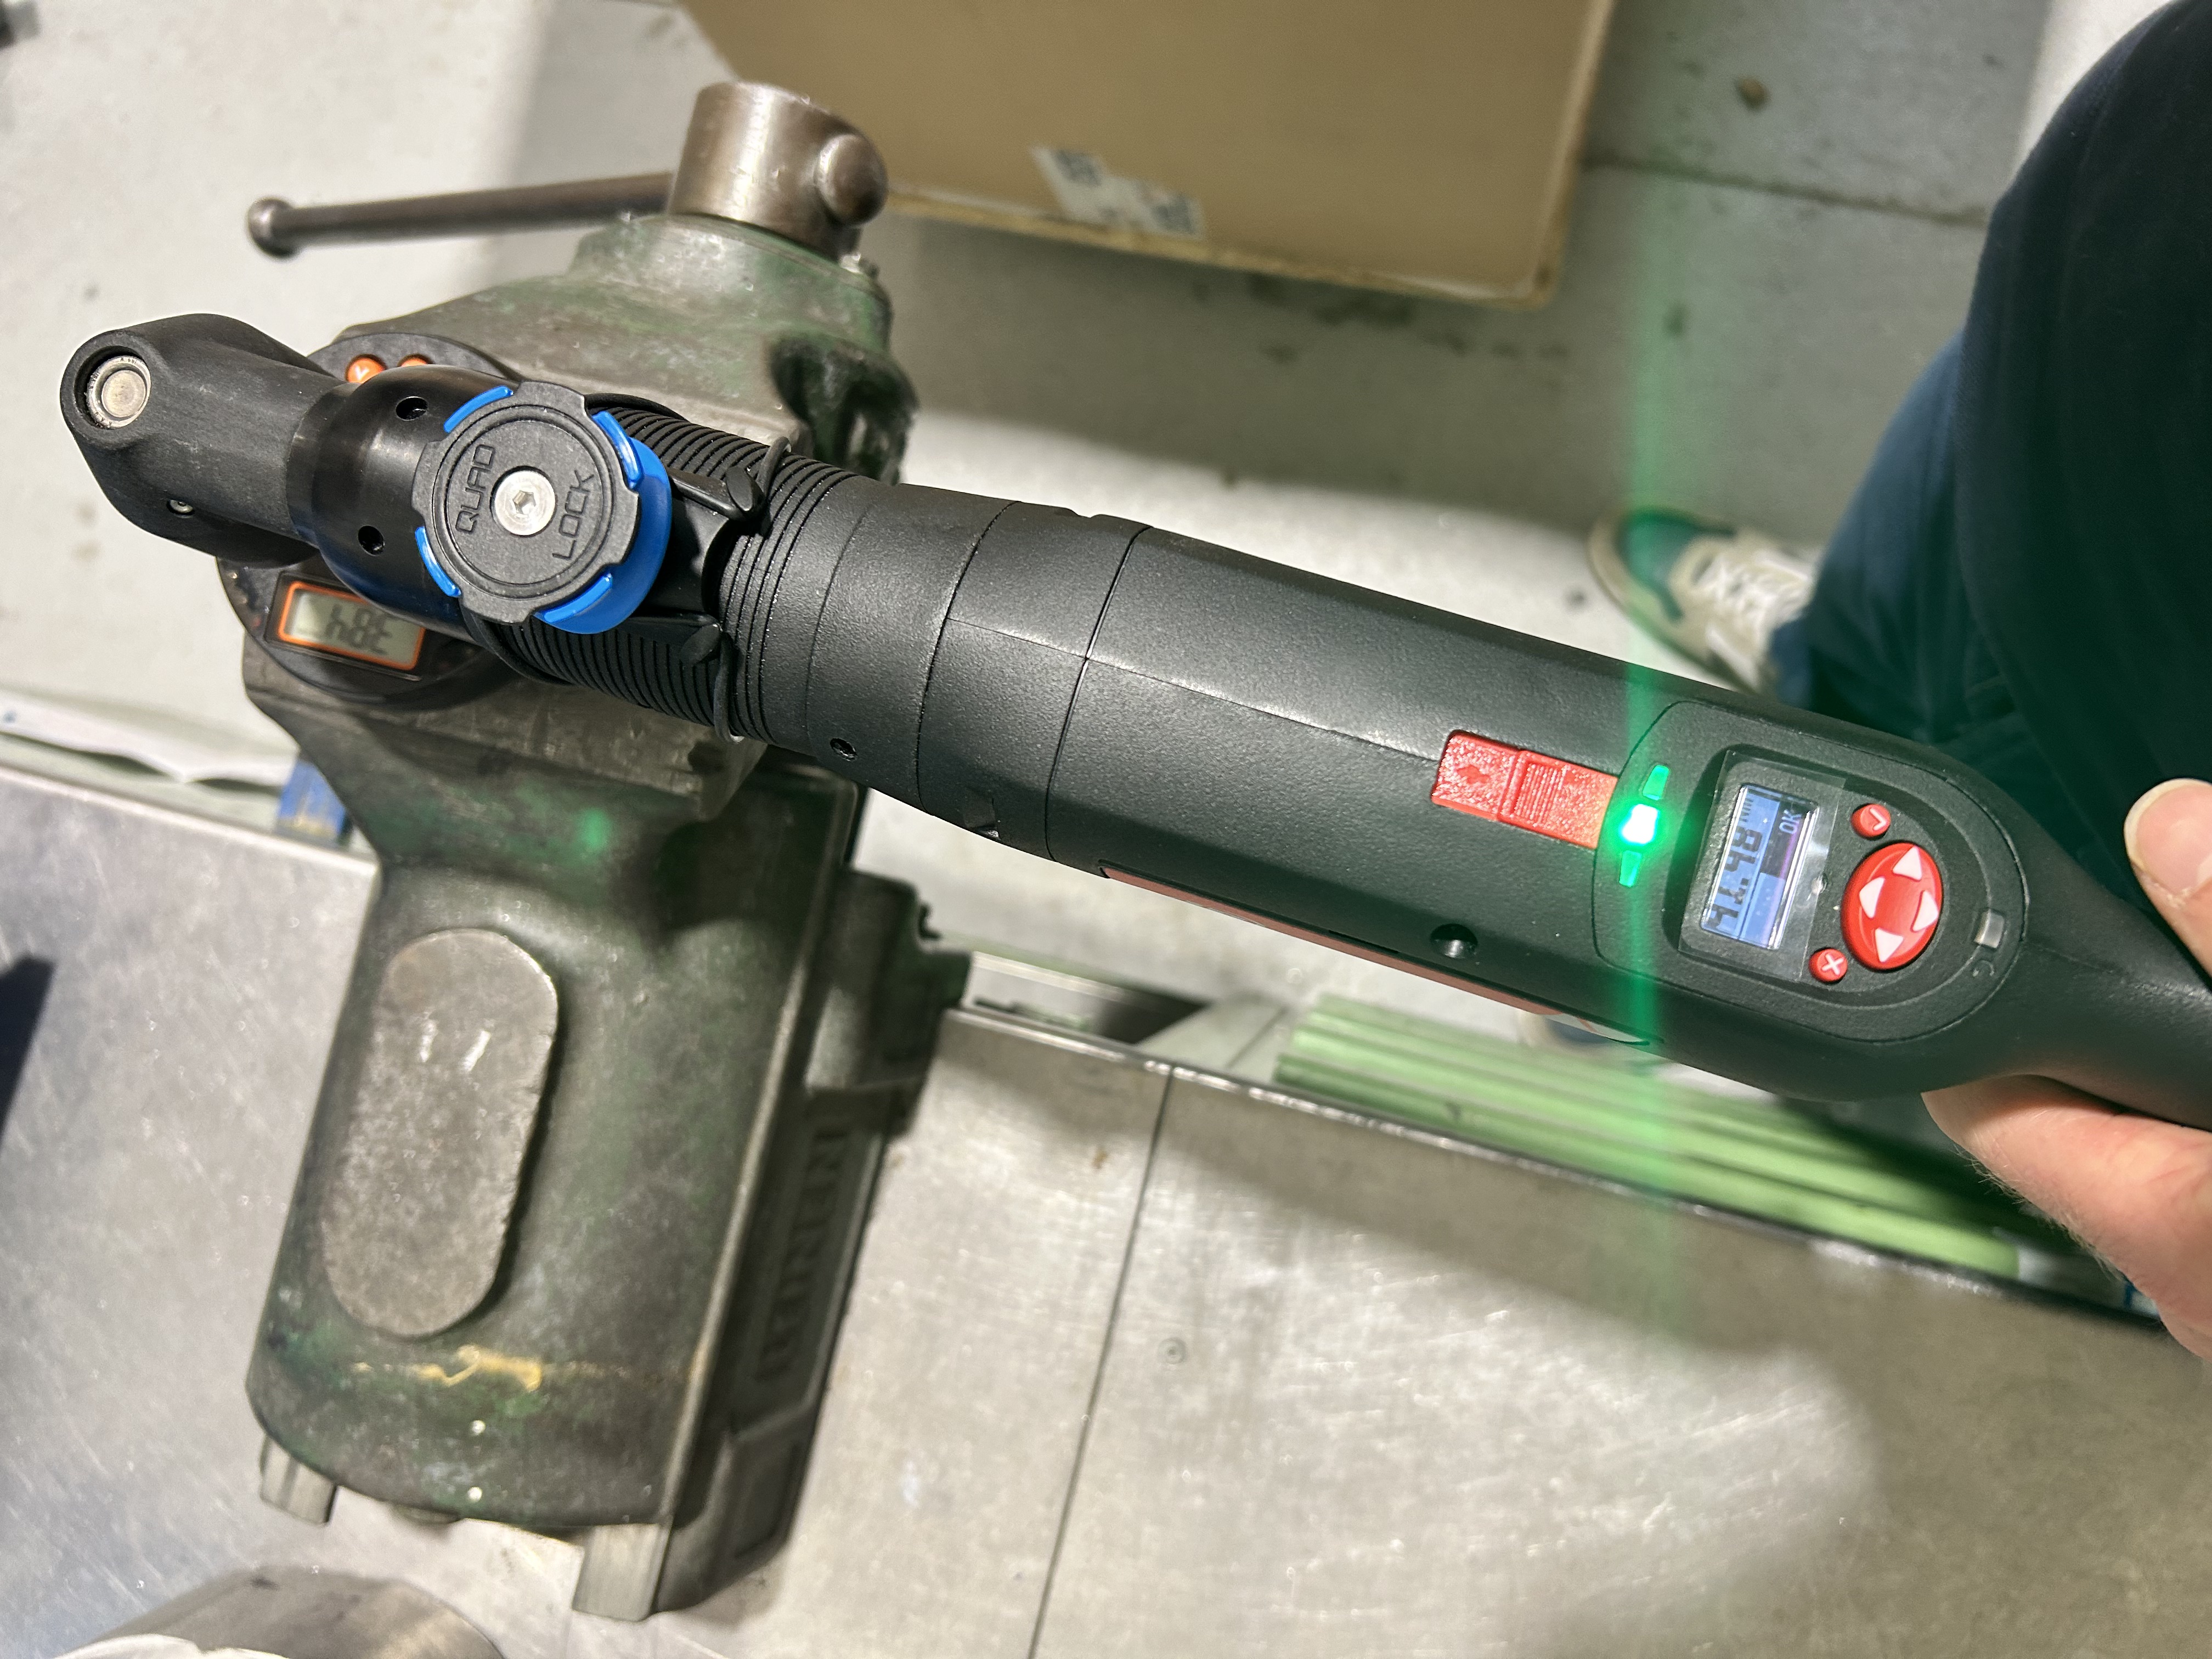
Example setup for Torque verification
5. Evaluating Results
Due to the difference in sampling frequencies between a high-speed transducerized tool (QX) and a digital adapter (Bahco), a variance of up to 10% may occur. However, by using the 10 RPM settings programmed above, this effect is significantly minimized.
Acceptable Range: If the average Bahco reading is within your site’s specified tolerance (typically 5-10%), the tool is verified.
Adjustment: If the variance exceeds 10%, the TR (Torque Ratio) on the QX tool may require adjustment via the Insight Connect software.
ADB SAFEGATE: QX Tool Verification Log
Tool Serial Number: ________________ | Date: ________________
Target Torque: 40 Nm | Speed Setting: 10 RPM
Pull # | QX Display Value (Nm) | Bahco Reading (Nm) | Variance (Nm) | % Error |
1 | ||||
2 | ||||
3 | ||||
4 | ||||
5 | ||||
6 | ||||
7 | ||||
8 | ||||
9 | ||||
10 | ||||
AVERAGE | A: | B: |
Instructions for Calculation:
Average QX (A): Sum of all QX readings divided by 10.
Average Bahco (B): Sum of all Bahco readings divided by 10.
Final Verification Status:
If B is within 36.0 Nm – 44.0 Nm (10% Tolerance), the tool is PASS.
If B is outside this range, the tool is FAIL and requires calibration adjustment.